
Custom Wood Floor Installation in Sioux Falls, SD: Herringbone, Chevron, Borders and Inlays | Sioux Falls Hardwood Flooring
Sioux Falls Hardwood Flooring, an experienced hardwood floor contractor, has provided custom wood floor installation for homes and businesses in Sioux Falls, South Dakota for 15 years. Instead of laying boards in straight runs across a room, custom wood floor installation uses patterns and layouts designed for the space. Options include herringbone, with short blocks meeting at right angles; chevron, with angled plank ends forming continuous V-shaped rows; borders and feature strips that frame the main floor; medallion inlays that create decorative figures within the flooring; and plank widths selected to suit the room rather than standard off-the-shelf sizes. Every custom floor design begins with choosing the pattern, wood species, plank width and installation direction before the first board is cut.
We follow NWFA installation guidelines, the wood flooring trade's published standards, and lay out every wood floor pattern from a center line marked down the room rather than measuring from a wall. White oak is the most common choice for patterned floors because its grain looks consistent across many small pieces, while walnut gives the floor a darker appearance and hard maple creates a much lighter one. A custom pattern requires more time to cut and fit than straight-plank flooring, and that additional labor is the main difference in price between the two installations.
We install custom wood floors throughout Sioux Falls, Minnehaha County and Lincoln County, and show you the proposed layout on paper so you can review it before making a decision. Call (605) 799-9142 for a free on-site estimate, or use the quote form to request a proposal.
Get A Free Estimate
Custom Wood Floor Installation: Patterns and Designs
Custom wood floor installation starts with a geometric layout drawn for the room, followed by cutting and fitting solid wood or engineered wood to match that design. Custom floor design includes pattern floors built from blocks and planks arranged at angles to one another, with decorative pieces inlaid into the finished floor. Standard-width boards laid in straight runs are part of ordinary wood floor installation and are handled as a separate service. Once the pattern is established, we select the wood species and the width each board will be milled to. All the flooring options described here use real wood.
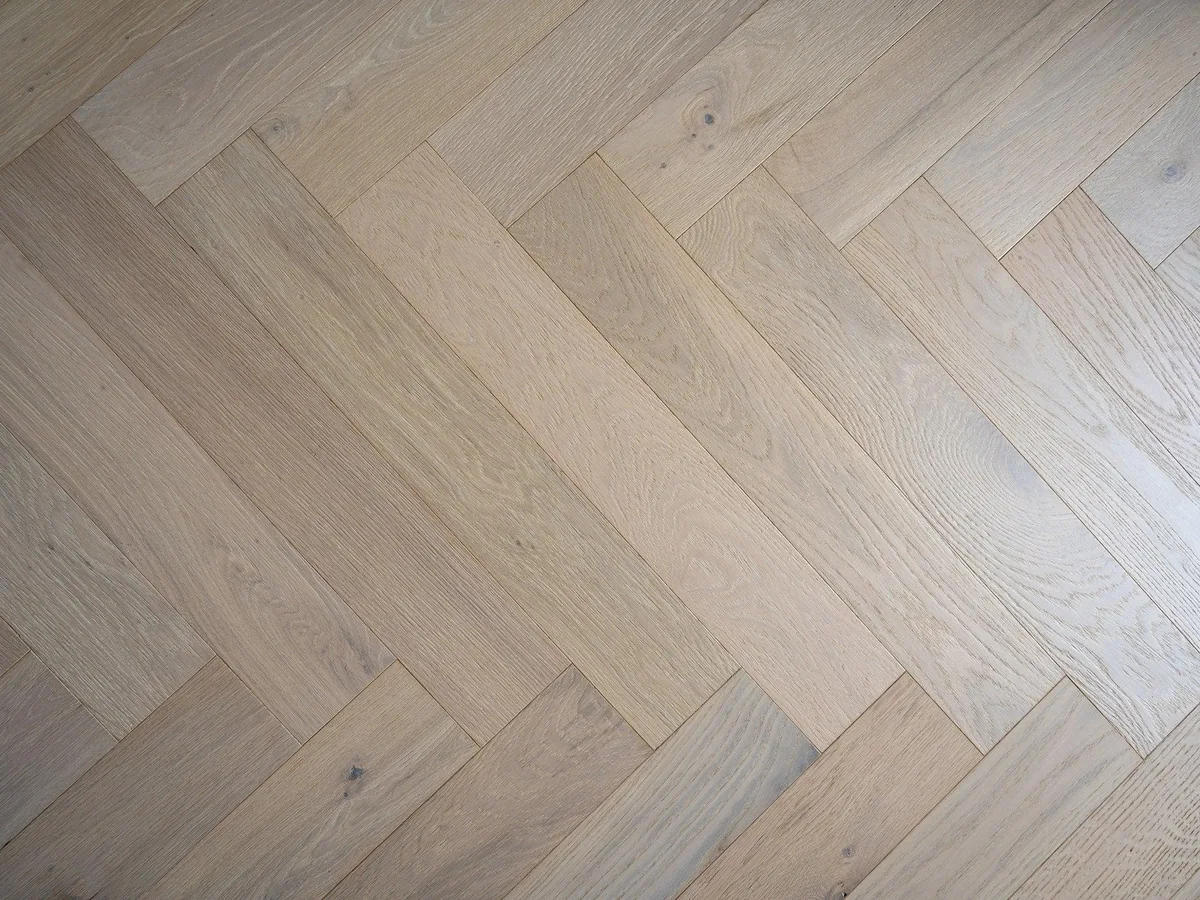
Herringbone Wood Flooring
A herringbone wood floor uses short, equal-length blocks arranged in a diagonal pattern across the room. Each block has square-cut ends and sits at a right angle to the next, with the end of one block meeting the side of its neighbor. This staggered arrangement creates the distinctive herringbone pattern. The proportions are a design choice rather than a fixed rule, based on your room's size and how closely you want the pattern to repeat. Blocks commonly measure between two and five times their width in length, with 4-by-12-inch and 5-by-15-inch white oak blocks both providing a three-to-one ratio. Longer blocks create a quieter, less detailed appearance, while shorter blocks produce a tighter, busier pattern.
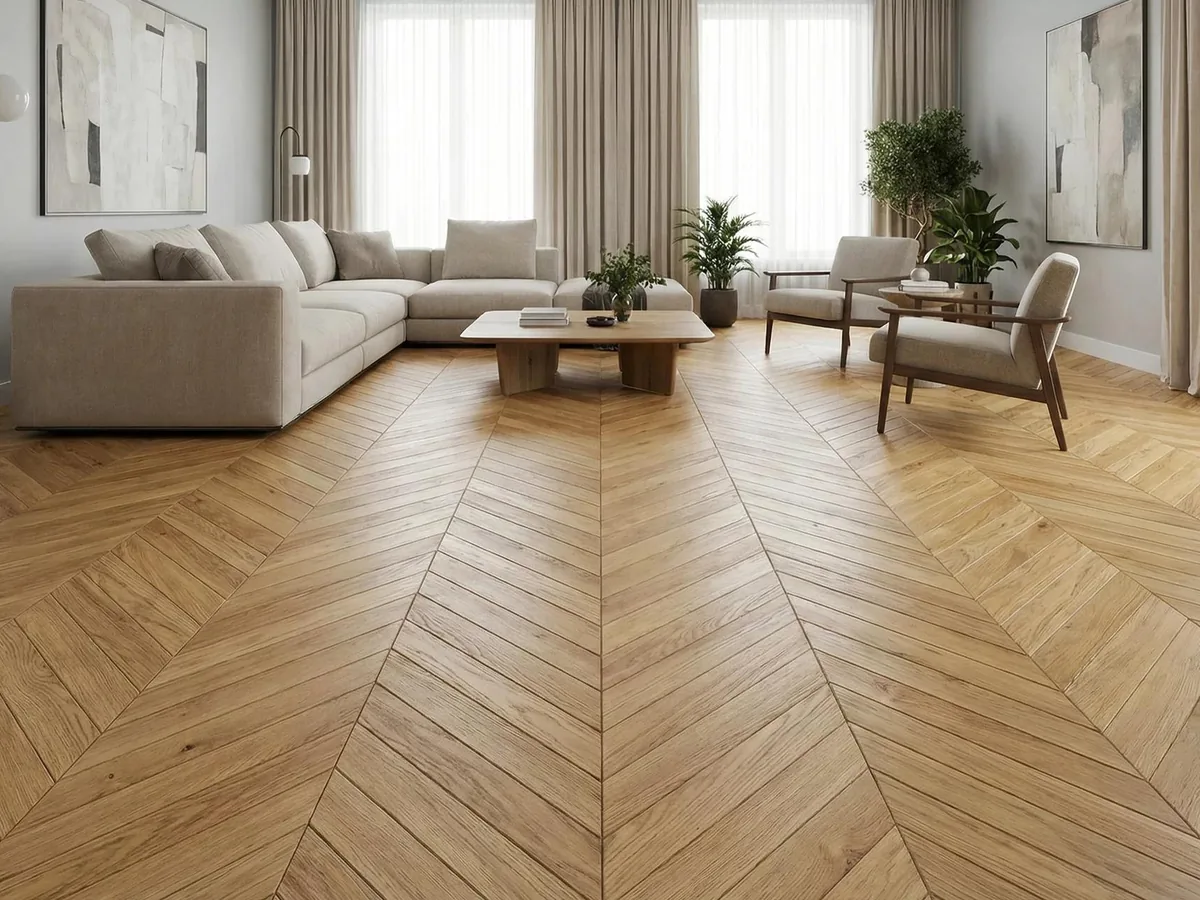
Chevron Wood Flooring
A chevron wood floor looks similar to herringbone, but the planks have angled ends that meet point to point, creating continuous V-shaped seams across the floor. To form these joints, a chevron pattern typically uses A and B planks, matched left- and right-handed boards, with the tongue and groove milled at the correct angle so the boards lock together at each point. We order these boards in matched pairs, which means a small additional order cannot simply be filled by a local shop. Some mills use a separate joining strip instead, and custom flooring shops also cut chevron angles on site. For our installations, we make the angled cuts needed at the perimeter and along the border.
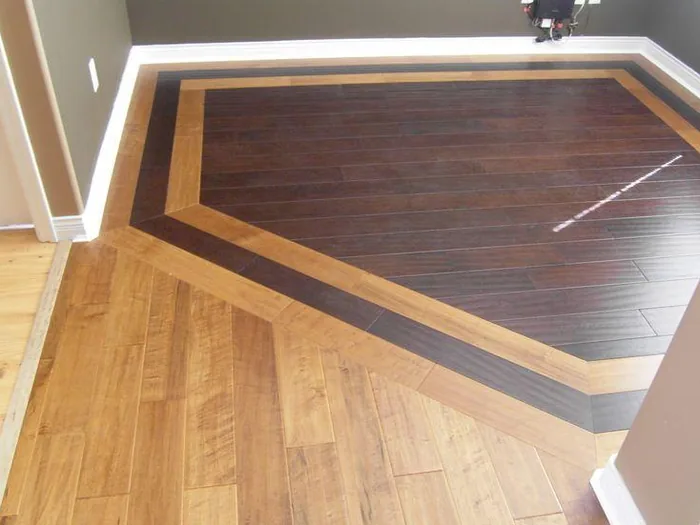
Borders, Feature Strips and Geometric Accents
We often frame a patterned floor with a wood floor border, a band three to six inches wide that runs around the edge without repeating the main pattern. The border creates contrast through a different wood species, such as walnut against oak, or by running the boards across the direction of the main floor. A stringer, a thin hard maple feature strip inside the border, sharpens that edge. The border also serves a practical purpose: because few rooms are perfectly square, we take up the error in the width of the band and leave the field running true. At the corners we either miter the bands to meet or lap one over the other as a block.
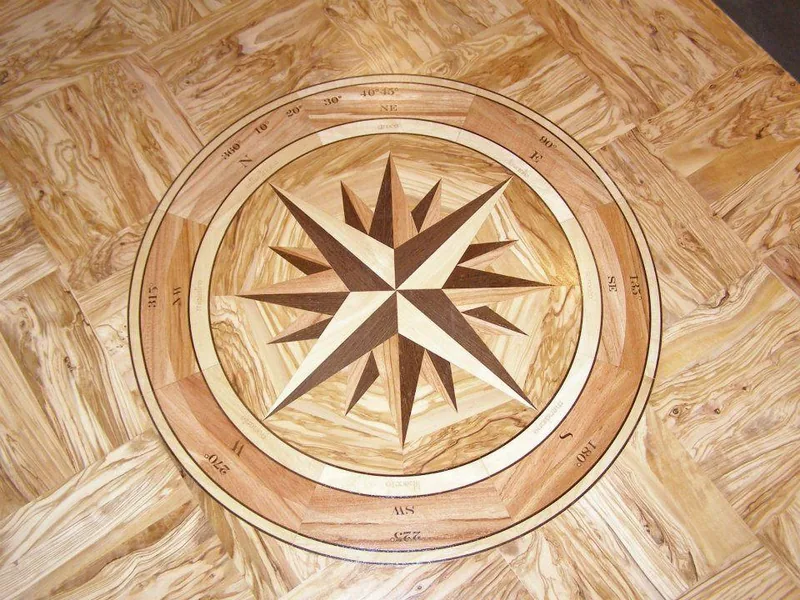
Medallions and Inlays
A wood floor medallion creates a focal point with a circular or square decorative design, often made from contrasting wood veneers that catch your eye as you enter the room. Most medallions measure 24 to 48 inches across. A custom inlay follows the same approach, with the piece assembled off site, either ready-made or built to your drawing. We use a matching template to route a recess into the floor so the inlay fits precisely. The thickness must match the surrounding boards, since a raised or recessed area is difficult to level afterward and remains visible through the finish. We establish the medallion's position during the initial layout and install the surrounding flooring to fit around it.
Wood Species and Custom Plank Widths
A custom wood floor installation brings together three decisions: the wood species, the width of each piece and the pattern geometry. Each choice affects the others, so we consider them together rather than separately. The three sections below cover species selection, custom plank width and how the two work together. A wood species that looks understated in long planks becomes more visually detailed when cut into short blocks, while a plank width that works well in a hallway can overwhelm a smaller room. We settle species selection and plank width alongside your chosen pattern, then include all three in one specification and written price for your approval.
Choosing Wood Species
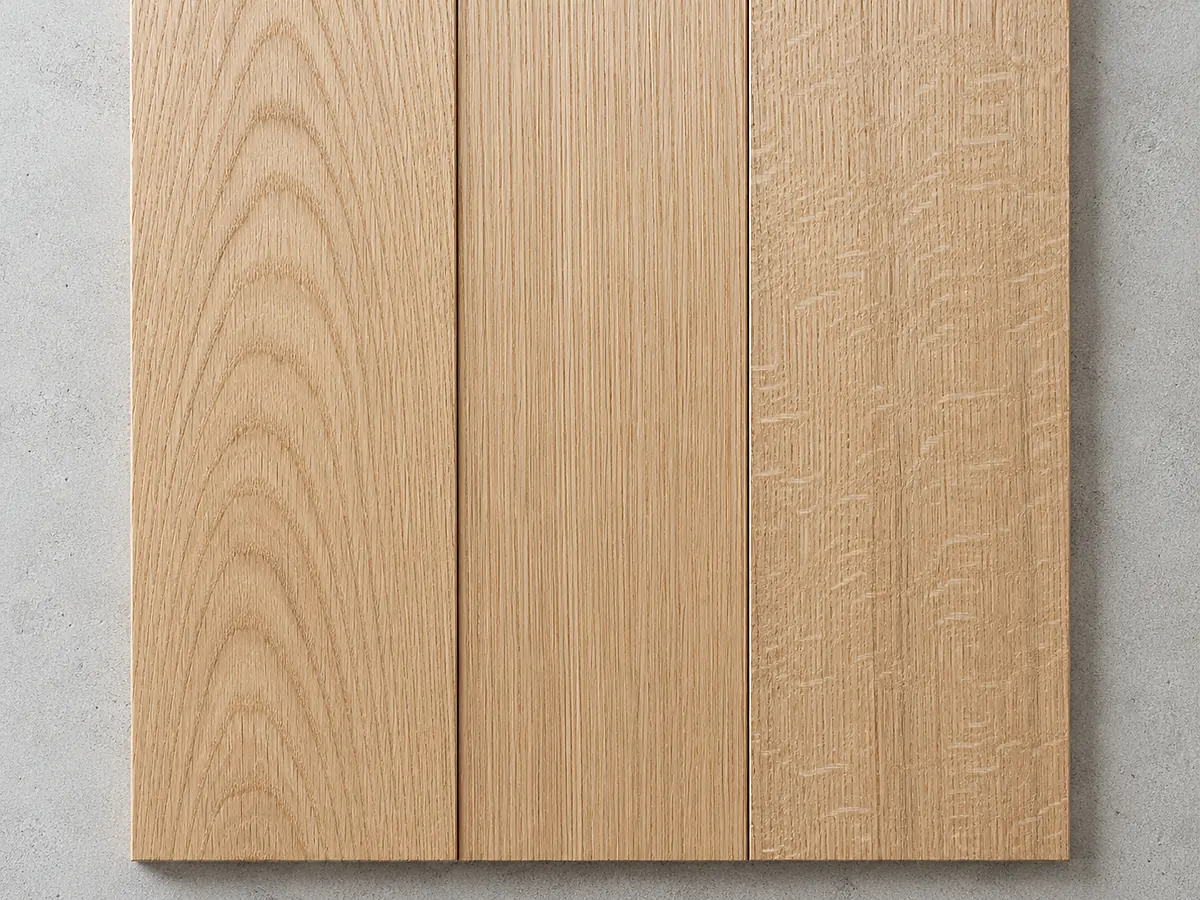
Species selection must suit the pattern you choose, not just a sample board. Patterned floors use many small pieces, exposing more end grain, the fibers cut across at each end, and it drinks finish faster than a board's face. White oak has a consistent grain that complements a pattern without competing with it, while walnut adds dark color that makes a tight geometry look heavier. Hard maple has a closed grain and tends to blotch when stained, and is the difficult one in small pieces. Among wood species for custom floors, quartersawn and riftsawn boards hold straighter grain lines in a short piece. Janka hardness measures resistance to denting: hard maple 1,450, white oak 1,360, walnut 1,010.
Custom and Mixed-Width Plank Flooring
We mill your boards to the widths specified in your custom floor design, commonly 5 to 10 inches or wider, so a wide plank floor is a specification rather than whatever the supplier stocks. A mixed width floor combines two or three plank widths in a repeating or random arrangement, and we include the exact sequence in the order instead of relying on an average width. Wider boards create fewer seams per square foot, allowing more of each board's natural grain to show without interruption. They also expand and contract more across their width during the heating season, making engineered wood construction an option for the widest planks. A room below grade is a separate conversation.
Matching Plank Dimensions to the Pattern
Plank width also determines the scale of the repeat, the design unit that appears throughout the floor. In a small bedroom, wide blocks create a few large shapes rather than a clearly defined pattern, while those same blocks form a balanced pattern in an open living area. Block length against width is a design choice, not a recommended ratio: your room's dimensions and the look you want settle it. Common proportions range from 2:1 to 5:1, with wider boards requiring longer blocks to maintain the same proportions. Angled ends also allow chevron planks to run longer than herringbone blocks of equal width. This is why we price custom plank width and pattern options together.
Custom Flooring Design and Layout
We finalize your custom floor design in two stages, with both approved before we cut the first board. First, you choose the wood species, pattern, plank width, any decorative borders and the finish. Next, we work out exactly how that design will fit your room, using measurements and markings on the floor rather than relying on a drawing alone. Your custom floor design consultation covers the initial choices with wood samples and a scale drawing. The sections below explain how we transfer that design into your room, from marking the center line to the loose dry-lay you walk on and approve before installation begins.
During your custom floor design consultation, we help you choose every detail of your finished floor, including the wood species, pattern, plank width, whether to include a border around the main floor and the level of shine you want in the finish. You review and approve a drawing showing those choices before we cut the first board. We make these decisions with you in the room rather than from a list because the pattern needs to suit the room's shape and the natural light falling across the floor. A long, narrow room calls for a different pattern repeat than a square room, and we account for those proportions in your design.
Samples in the Room They Will Live In
A sample panel shows a small section of the actual flooring with the same finish planned for your floor. We bring white oak and walnut samples and set them down where the floor is going, in that room's own daylight and under its lamps, because north-facing light is cooler than a west window and a warm bulb shifts the color again. We also compare the samples against your trim, cabinets and adjoining floors. Pattern samples come laid up as a block of several pieces rather than one board, since the pieces face different directions and one species shows both light and dark. Sheen is the one choice only the room's own light can settle.
Drawing the Layout Before the Price Is Fixed
A scale drawing turns your design choices into a detailed layout we can price. We draw the pattern to scale on a plan of your room, mark the direction it will run and show the exact placement of any borders or medallions. We use that drawing to calculate the square footage and waste allowance needed for the installation. You review and approve the layout before we order materials, and your itemized proposal lists the layout set-out as a separate price. Your signed drawing authorizes the material order and serves as the reference for installation, ensuring the finished floor matches the design you approved. Call (605) 799-9142 or request your free estimate to get started with your custom floor design.
When we begin setting out your patterned floor, the wood is already on site and you have approved the design drawing. This stage determines the direction of the repeating pattern, how it meets each wall and where we account for any walls that are not square. The drawing establishes the design, while set-out determines its exact position in your room. Because no room is perfectly rectangular, we identify differences in the room's dimensions and adjust the layout to accommodate them rather than discovering a problem at the final wall. We complete these adjustments before fastening any boards, while the chalk lines are still easy to move.
Snapping the Center Line and Reading the Room
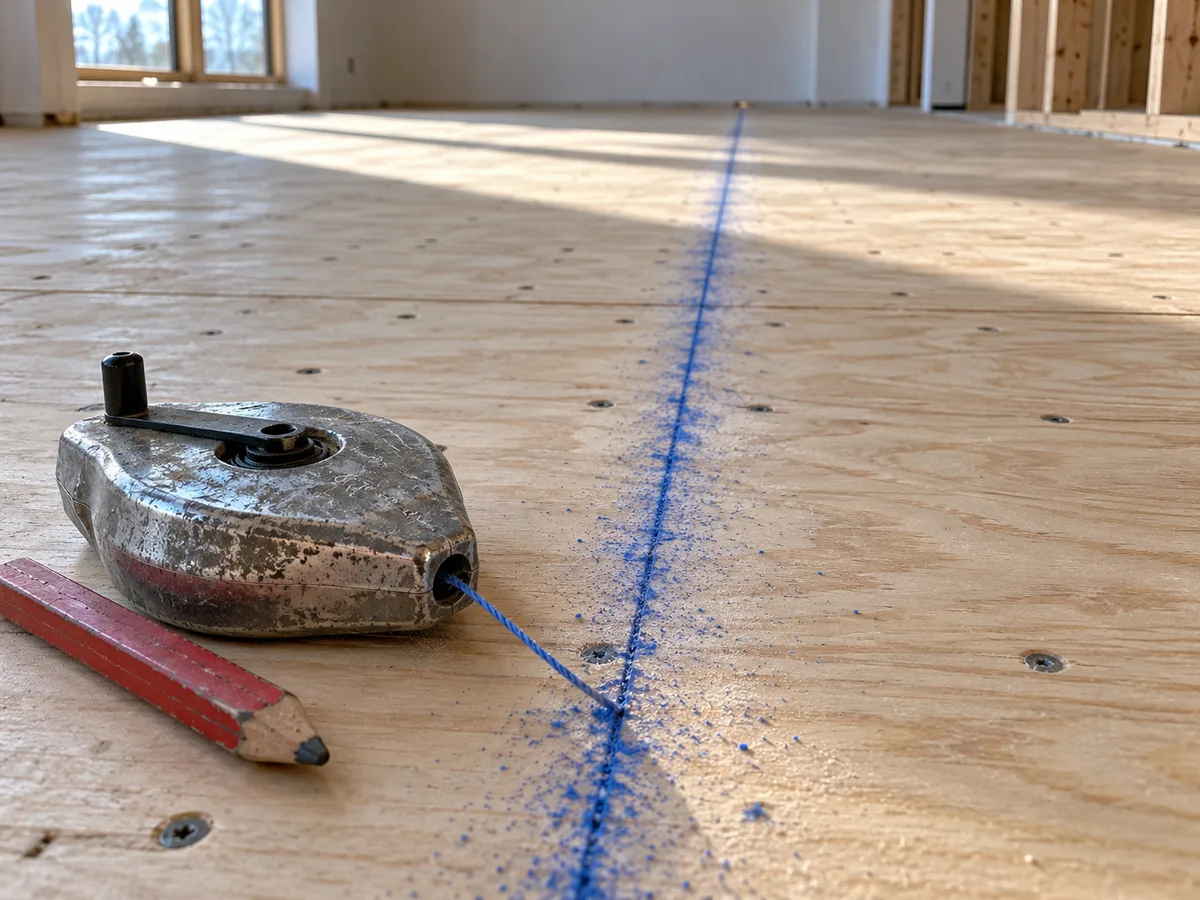
Pattern set-out begins with a center line marked using a chalk line, a string of powdered pigment that marks the floor when snapped. We run this line along the room's main axis, typically the sightline from the entrance. Walls in a finished house are seldom parallel, and a pattern begun off one leans away from every wall it meets. Before marking the center line, we measure both diagonals and use a 3-4-5 triangle, with sides measuring three, four and five units, to establish a true right angle. That tells us how far out of square the room is, and we put the error where you will notice it least, working to the NWFA installation guidelines.
Where the Pattern Lands at the Walls
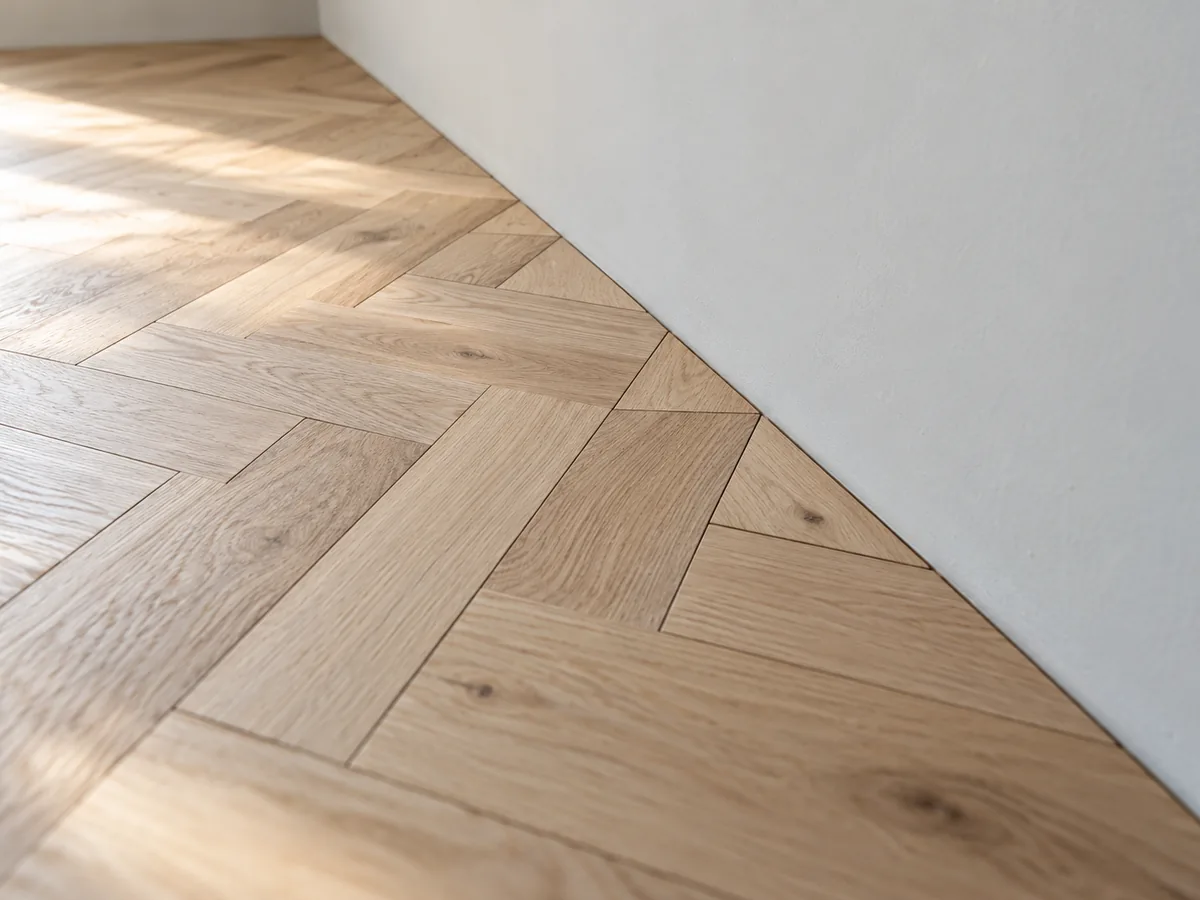
A balanced set-out keeps the cut pieces at opposite walls roughly equal in width, which is why the pattern layout is centered rather than started against a baseboard. Starting tight against one wall leaves the difference at the opposite side, where the pattern ends in a narrow sliver that immediately draws attention. We also align the repeating pattern with fixed features in your room, including doorways, fireplaces, kitchen islands and the edge of a stair landing. Where your new patterned floor meets existing straight-laid flooring, we install a wood floor transition using a threshold strip or border band, creating a clean, finished edge between the two layouts.
Dry-Laying the Field Before Anything Is Fastened
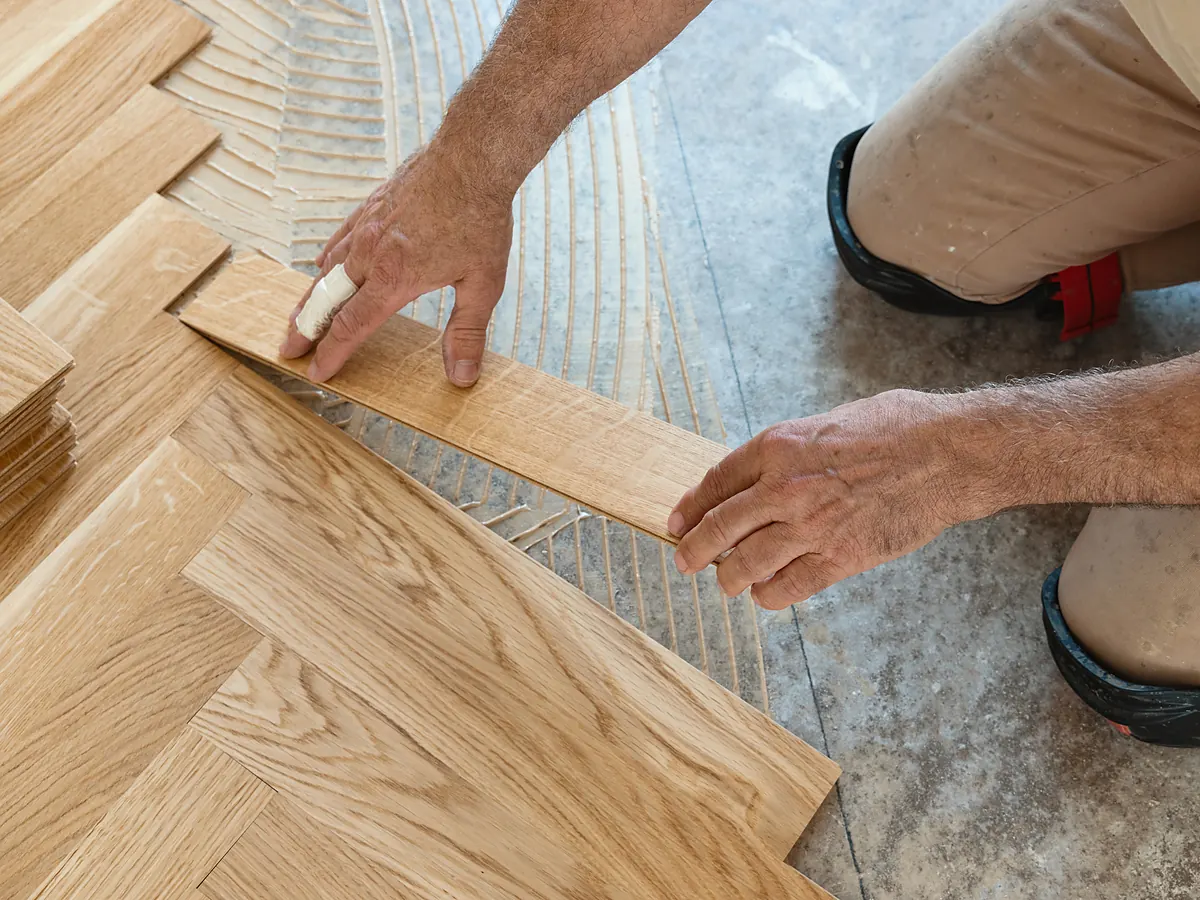
A dry lay lets you see the proposed pattern in your room before installation begins. We place several rows of loose boards on either side of the center line, without fastening anything, so you can review the pattern repeat, border position and distribution of wood colors in natural daylight. The layout can still move for nothing at this stage, though the wood itself is already bought. Flooring arrives in bundles, and boards from the same bundle frequently share similar colors and grain patterns. We draw from several bundles at once, a practice called racking, so no batch settles in one corner and leaves a dark patch. What you approve at the dry lay is what gets nailed down.
Our Custom Flooring Installation Process
From your first call to the day your finished floor is ready to walk on, our pattern installation runs through seven stages. Each stage ends with a decision you review and approve before Sioux Falls Hardwood Flooring moves to the next, keeping your custom floor design aligned with your choices throughout the project. A pattern installation holds tighter tolerances than straight-laid boards, so flooring inventory and material sourcing sit in the middle of the sequence. We order and mill the blocks to the approved specifications before installation begins.
-
1.
You call us or send the quote form, and we book a free on-site estimate.
-
2.
We visit your home to measure the room, check whether its walls meet at true right angles, show you laid-up samples and talk through your options.
-
3.
We draw the layout to scale and send you the itemized proposal.
-
4.
Once you approve that proposal, we order the whole quantity in one mill run, including the waste allowance.
-
5.
We strike the center line and dry-lay the field in your room.
-
6.
We install the floor, then sand and finish it where the material arrived unfinished.
-
7.
We walk the finished custom wood floor installation with you and leave the attic stock from your own run behind.
What a Pattern Floor Requires That Straight Plank Does Not
Subfloor Preparation, Moisture Testing and Acclimation
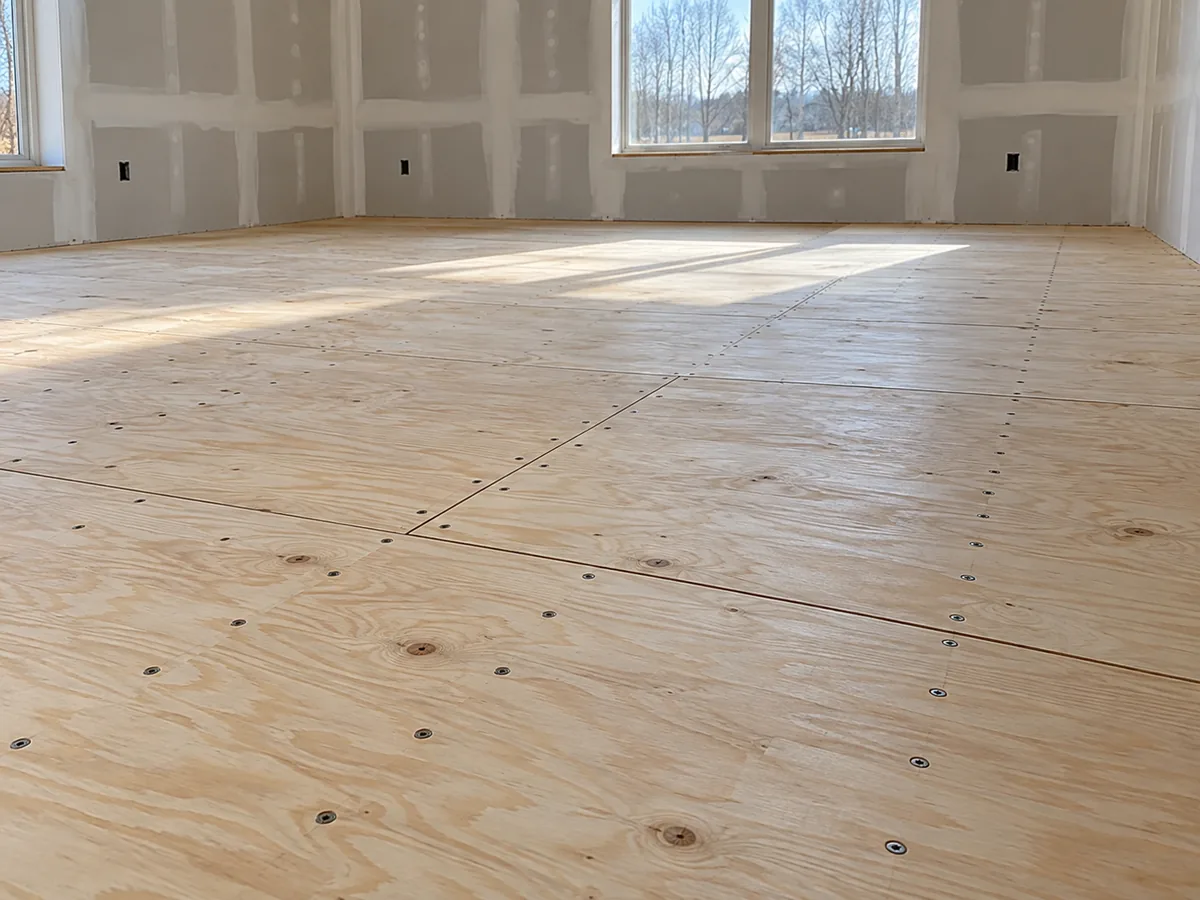
Before marking the first layout line, we inspect the subfloor for flatness and check that the underlying structure provides adequate support for the wood flooring. Low spots and raised areas put stress on board joints when someone walks across the floor, causing seams to open. We also measure moisture levels in both the wood and the subfloor, allowing the materials to reach the required conditions before installation. The flooring is conditioned in the room where it will be installed, not stored in a garage. NWFA installation guidelines and the manufacturer's instructions establish the moisture limits and installation requirements for the specific flooring material you have chosen.
We also select the fastening or adhesive system to suit your flooring, subfloor and installation conditions, with concrete slabs and radiant heat requiring different specifications. Along the walls, we leave expansion space so the wood has room to widen, concealing that space beneath the border where your design includes one. Every piece of a patterned floor fits against neighboring pieces on several sides, creating far more joints than a straight-plank installation. Because those joints need to stay tightly aligned, soft spots in the subfloor or wood that has not properly adjusted to the room's conditions cause visible gaps that would be less noticeable in a straight-laid floor.
One Mill Run, and Why the Whole Quantity Is Ordered Together
A mill run is a single batch of flooring boards cut and graded together. Pattern blocks and custom widths are cut to your drawing rather than pulled from warehouse stock. Material sourcing means ordering everything from the same run, since wood color and grade vary between batches and boards ordered later will not match the original flooring. We order the main floor, borders and waste allowance together to keep the materials consistent. Custom runs are quoted in weeks, not days, so your start date waits on the mill. Where the mill permits it, you review and approve samples from the actual production run. Pre-finished blocks arrive with their coating on; unfinished blocks we sand and coat in your room.
Waste Factor on a Pattern Floor
A waste factor is the extra material ordered beyond the measured floor area. For patterned floors, we plan for roughly 10 to 15 percent waste, compared with 5 to 10 percent for straight-plank installations. These are planning allowances rather than actual waste measurements, and we establish the amount during material sourcing, before cutting begins. The extra goes into angled offcuts, perimeter cuts, and boards rejected on grade. Chevron floors with mitered borders require an allowance at the higher end of that range, with matching A and B planks ordered together. We also set aside a small amount of attic stock, which is wood from the same mill run reserved for future repairs. Waste appears as a line on your proposal.
Working Lines, and Where a Pattern Drifts
Working lines are extra lines struck square to the room axis, parallel to the center line, and we check the laid field back against them every few rows. Even a half-degree error builds up across repeated rows until the seams become visibly uneven. If the pattern starts to drift, we correct the alignment at a stringer or border rather than forcing the boards together. The field pieces arrive already milled, so the cutting is at the perimeter, the border and the fit against your existing floor. Each angled edge is set from a cut sample checked against the line rather than off the saw's scale. Herringbone is the more forgiving of the two patterns at the edge.
Fastening a Pattern Without Opening the Joints
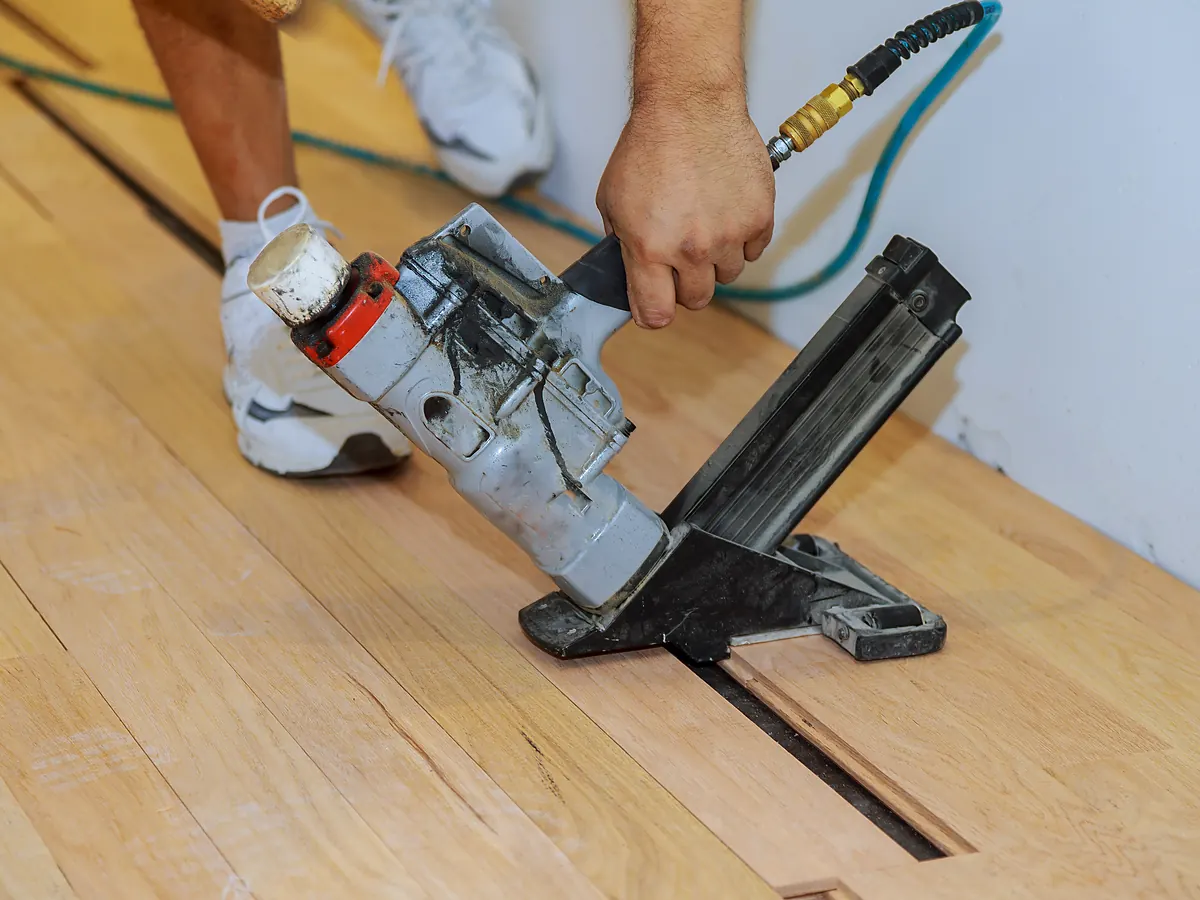
We install the pattern from the center line outward in both directions, distributing any small alignment differences between opposite walls rather than concentrating them at one side. Most boards are held by blind-nailing, meaning the fastener goes through the tongue and nothing shows on the surface. A short angled piece leaves too little tongue to reach, so we add urethane adhesive or a face fixing. Flooring cleats and staples hold short blocks differently, so we choose the fastening method and spacing based on each piece, the flooring material and the manufacturer's instructions. We undercut doorways and casings so the pattern runs through, and a wavy subfloor shows sooner here than on a straight run.
Pricing
What Custom Wood Floor Installation Costs in Sioux Falls
The geometry of the pattern and the wood you choose set your custom wood floor installation cost, and we finalize both before fixing a price. We use a measured drawing of your room to calculate the material quantities and labor required, giving you a firm price before the wood arrives. Layout set-out is priced separately on your proposal using that same drawing. The published range covers installation labor, layout set-out and finishing where the material arrives unfinished. The wood itself appears as a separate specification and price. Removal of existing flooring is also priced separately, along with any subfloor repairs based on the conditions we find during inspection.
What Moves the Price on a Pattern Floor
Patterned flooring requires more installation labor than straight-plank flooring, with a premium of 20 to 40 percent above our standard straight-run labor rate. Chevron costs more to install than herringbone because every angled end must be precisely milled and the points must align across the room. Adding a border requires mitered cuts around the perimeter and the purchase of a second flooring material. A medallion involves detailed bench work completed off site, followed by routing a matching recess into your floor for installation. When angled boards arrive pre-cut from the mill, the material price increases but the installation labor decreases. The waste allowance is material you pay for and never see.
What the Written Proposal Names
Installed, custom wood floor installation runs $12 to $22 per square foot, and that figure includes the layout set-out. At those rates, a 300-square-foot room would cost $3,600 to $6,600. These prices illustrate our published range rather than provide a quote for your specific room. Your written estimate establishes the actual scope of work, required subfloor preparation and any exclusions. We provide an itemized proposal so you can see exactly what each part costs, with separate lines for the wood material specifications, layout set-out, waste allowance and finish system. We provide free estimates and offer financing for larger projects.
Your estimate begins with a visit to your home, where we measure the room, discuss your preferred flooring patterns and wood species, and gather the details needed for a written proposal that includes the layout and installation price. Call (605) 799-9142 to schedule your free on-site estimate, or use the quote form to send us your room dimensions before the visit.
Why Choose Sioux Falls Hardwood Flooring
We do not order materials until you have reviewed and approved the drawing for your custom wood floor installation. This protects you from paying for wood that has already been cut and milled to a layout you have not agreed to. You see the pattern drawn to scale and receive an itemized proposal showing what each part costs before Sioux Falls Hardwood Flooring places the order. Until you approve the design, changes are free. We take responsibility for providing all the drawings and pricing details before you make a financial commitment.
Before anything becomes binding, you have two more details to review and confirm:
- A written itemized estimate, with each part of the work priced on its own line, including the layout set-out line item.
- 15 years in business.
We carry the insurance and bonding applicable to our work and can provide documentation on request. Flooring and finish materials carry their manufacturer's warranty. Call us at (605) 799-9142 to discuss your project, and we will provide a detailed drawing and written estimate with itemized prices for your review before you make a decision.

Service Area
Custom Wood Flooring in Sioux Falls and Nearby Communities
A pattern floor in Sioux Falls has to answer the winter, not only the room. Throughout the heating season, roughly October through April, heated indoor air becomes drier than the conditions in which the wood was milled. Because patterned floors have more joints per square foot, seasonal movement becomes visible along more board edges. Custom wood floor installation here begins with material specified for that swing before any of it is ordered, and the moisture readings made on site are held to the manufacturer's spec. Maintaining your home's indoor relative humidity within the manufacturer's recommended range helps keep the joints closed. We serve Brandon, Harrisburg, Tea, and other communities across Minnehaha and Lincoln Counties.
Communities We Serve
Sioux Falls Hardwood Flooring installs custom patterned wood floors in homes throughout Sioux Falls and the surrounding communities of Minnehaha and Lincoln Counties. Our service area includes neighborhoods within the city, nearby towns and rural properties across both counties. We schedule your on-site consultation and installation based on your location, accounting for travel and project logistics. The communities we serve include:
Communities We Serve
- Brandon
- Harrisburg
- Tea
- Hartford
- Dell Rapids
- Lennox
- Canton
- Crooks
- Baltic
- Worthing
- Valley Springs
- Garretson
- Humboldt
- Colton
- Renner
- Chancellor
FAQ
Frequently Asked Questions
Homeowners have several common questions about patterned wood floors, from choosing a pattern and wood species to installation timelines and future repairs. The answers below cover the questions we hear most frequently. If you have a question that is not addressed here, ask us during your on-site consultation and we will give you a clear, specific answer for your project.
How much more does a herringbone or chevron floor cost than straight plank?
Installed, expect $12 to $22 per square foot, with pattern work adding 20 to 40 percent more labor than a straight-plank floor. Your price within that range depends on the material grade, the size of your room and how many walls the pattern has to meet.
What is the difference between herringbone and chevron?
Herringbone blocks have square-cut ends and meet at a right angle, so each block sits against the side of its neighbor. Chevron ends are cut at 45 degrees and meet point to point, forming a continuous V that runs the length of the room.
How long does a custom floor take from start to finish?
We quote a patterned wood floor in weeks rather than days. The pieces arrive already milled, but each one is positioned, fitted and fastened to hold the pattern, and the perimeter cuts, the sanding and the finish coats each need their own time on site.
Can a herringbone floor meet an existing straight-plank floor in a doorway?
Yes, and we plan that transition so both floors have a clean, finished edge. A border band brings the pattern to a straight edge before the doorway, while a threshold strip separates the two floors outright. We show you both at the doorway in question.
Which species work best for a pattern floor?
White oak is our usual recommendation, because its grain is even across every block and nothing jumps out at you from one piece to the next. It also carries a Janka hardness rating of 1,360. A pattern exposes far more end grain, which drinks finish and darkens, so a blotchy species shows every cut.
If a board gets damaged years from now, can one piece be replaced?
Yes. We leave you attic stock, which is spare flooring from the same mill run, to provide a much closer match when repairs are needed. However, wood naturally ages and its finish changes over time, so a replacement piece will still show some difference against boards that have been in place for years.
If you are considering a patterned wood floor, schedule a free on-site consultation. We will walk through your room, review the pattern options that suit your space, and provide a written layout and price for your approval before you make any commitment. Call (605) 799-9142 to schedule your visit, or submit your project details through the quote form.